Installing and configuring 2FA enabled web managed access solution (jumphost) to any infrastructure deployed on Akamai Connected Cloud Compute – part 2
In previous post, we deployed our Cockpit server which we will use as a jump host/tunnel.
For us to actually start using the solution, we need to do a few things:
- Create the users
- Create or import SSH keys & configure 2FA using Google Authenticator
- Configure network and firewalls around our jumphost and rest of the infrastructure
- Connect
Creating users
Creating users is extremely easy doing Cockpit; on top of that, it gives the users to self manage their keys and 2FA configuration.
- Go to the URL or IP of the Cockpit server you just deployed and log in using the credentials you’ve configured in your StackScript.
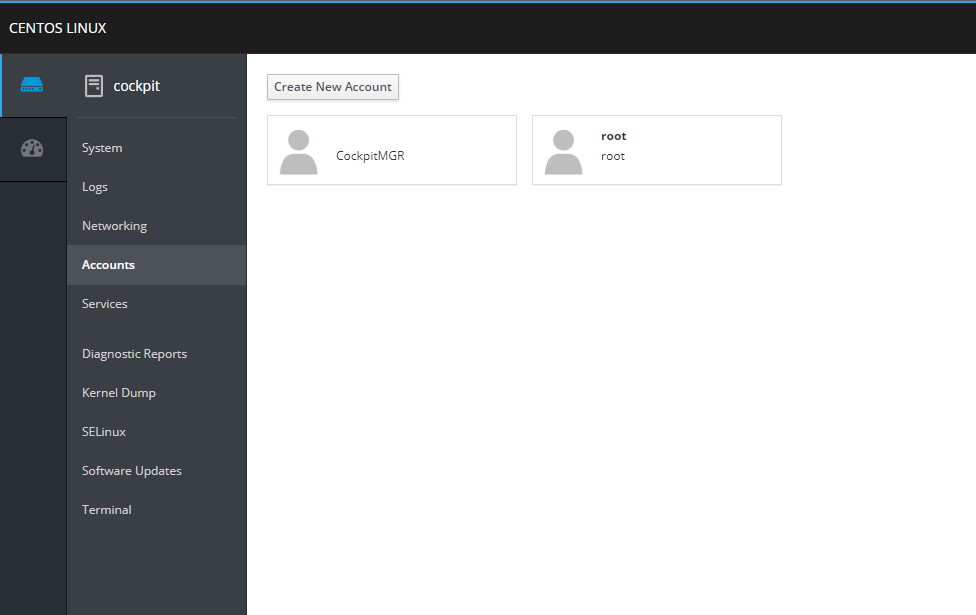
- On the left hand side, click the “Account” menu option and then on “Create new account” button
- Enter the user details and press “Create button”.
After the user(s) has been successfully created, let’s switch to the user’s point of view and see how rest of the onboarding process looks like.
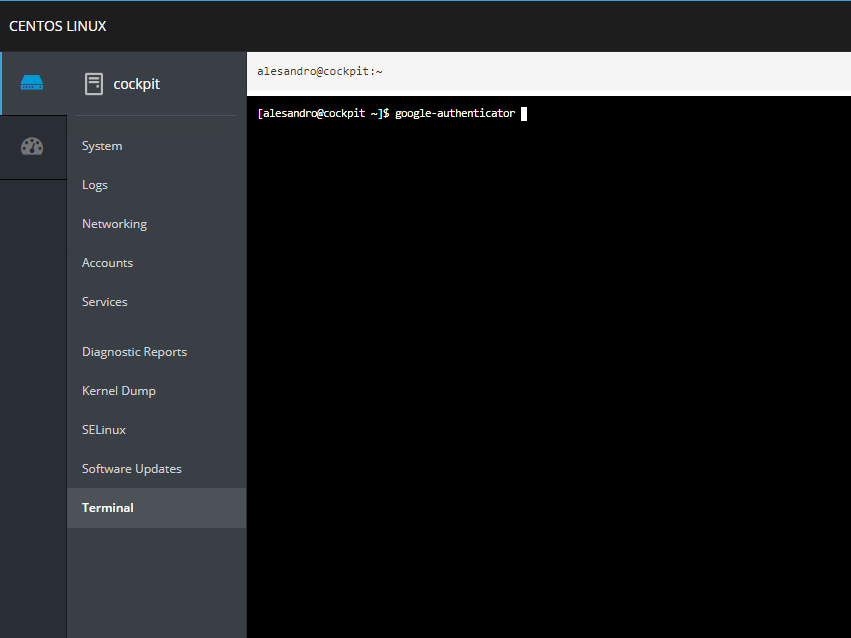
- Log in with the user’s credential we’ve just created and navigate to “Terminal” option.
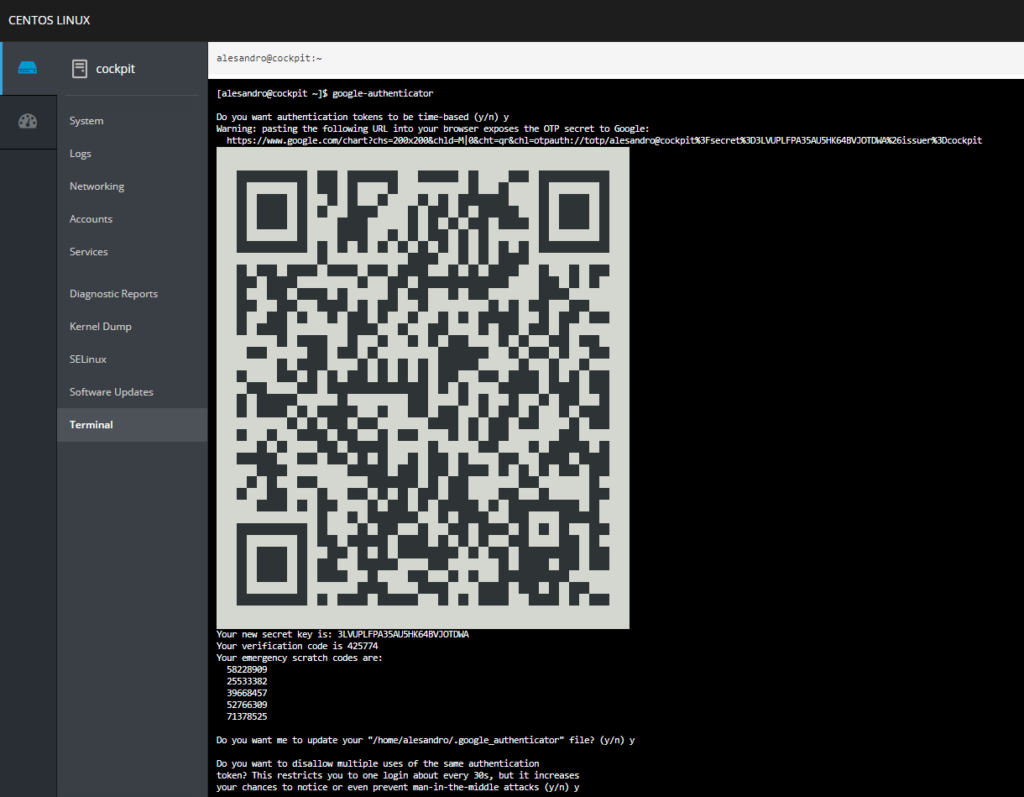
- Once there, type in: google-authenticator and press enter. This will start the process of configuring your 2FA authentication
- You are free to modify the authentication behavior, just make sure to save the authenticator file when the wizard asks you to do so.
As a final step, we just need to upload our SSH public key and we’re all set to start securely connecting to our infrastructure.
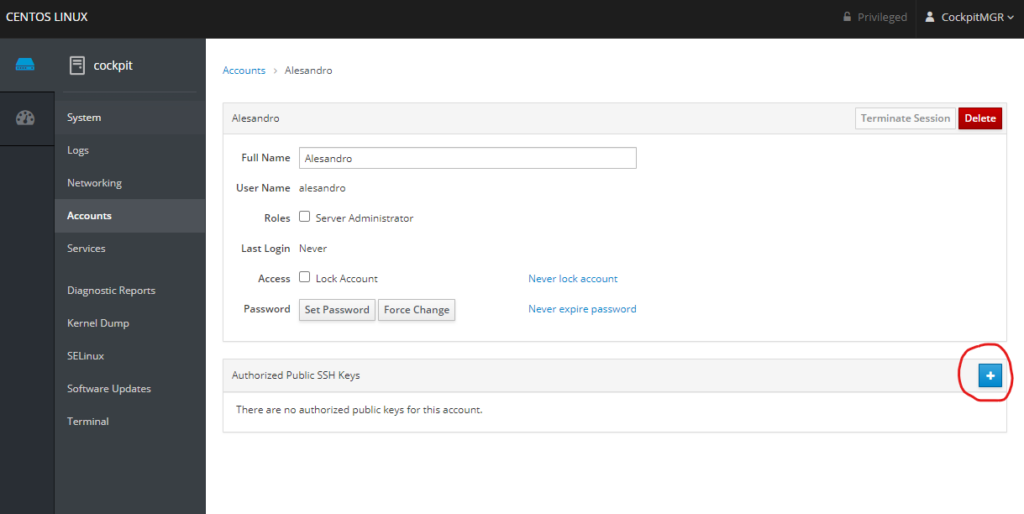
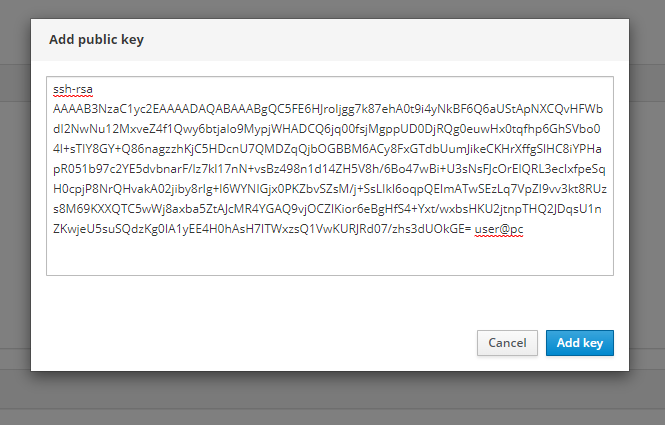
Entire procedure is really straight forward; go to “Accounts”, click on your username, and on the right hand side, under the “SSH Keys” section, click the “+” button. Paste you PUBLIC ssh key and click “Add Key” button.
That’s it! You’re done! In the upcoming blog posts, I’ll talk how to configure your local machine to connect to your infrastructure, how to secure the infrastructure you’re connecting to, and finally, how can we make this solution highly available.
Cheers, Alex.
