Fix Linode Windows VM IP configuration using Windows SAC console and Lish.

Today I decided to migrate my Windows VM running on Linode from Paris region to Amsterdam region.
After kicking off the migration through the Cloud Manager (which took <15 minutes), my instance wasn't responding to any network requests. Problem was completely cause by me, by configuring a static IP on the VM. After the VM got migrated to Amsterdam DC, it got a new IP which wasn't configured on the interface.
The Lish Console, also called the Linode Shell, provides direct console access to all of your Compute Instances. Through Lish, you can easily access your Compute Instance’s internal Linux system and run commands, install software, or configure applications. Lish is especially useful when you are not able to connect to your server through other means, such as SSH or the entire network stack is down.
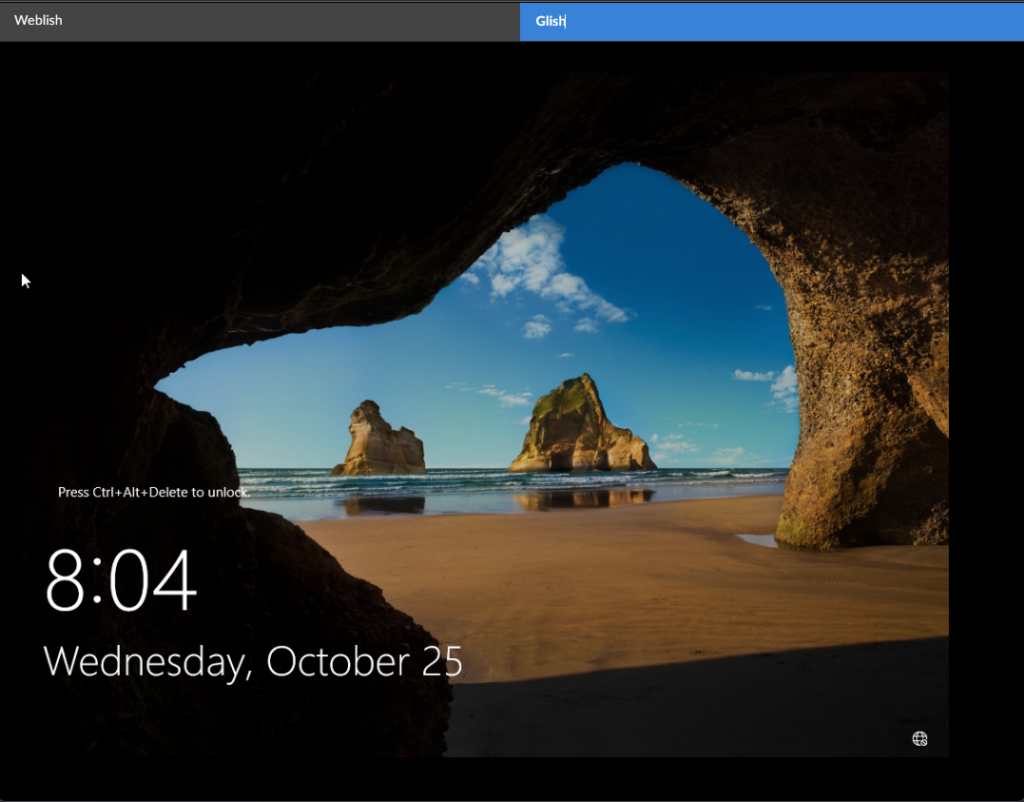
Alongside Lish, there's also a tool called Glish, which stands for "Graphical Linode Shell", which you guessed it, has the ability to display your desktop environment, including Windows.
Problem comes when we run an UNSUPPORTED deployment of Windows OS on Linode and want to send "CTRL + ALT + DEL" command to the OS. Glish doesn't have that ability built-in.
When I say unsupported I mean that Windows OS works on Linode (quite good!), but there's no official support from Linode when it comes to debugging your system.
If the VM starts up (aka, passes the "BIOS" stage and has a boot attempt) Linode's work here is done and support won't be able to provide any help with debugging your instance in case it doesn't work properly. With that out of the way, let's check out what options we have to fix the IP address of the interface.
- Extract a valid GLISH session ID and use noVNC to connect over a WebSocket (more complex)
- Use Windows SAC console which is available via Lish to configure the IP on your network adapter (less complex)
We'll go with option 2 :) Go to Linode Cloud Manager, click on your VM and launch Lish Console.
You will be presented with a screen like this:
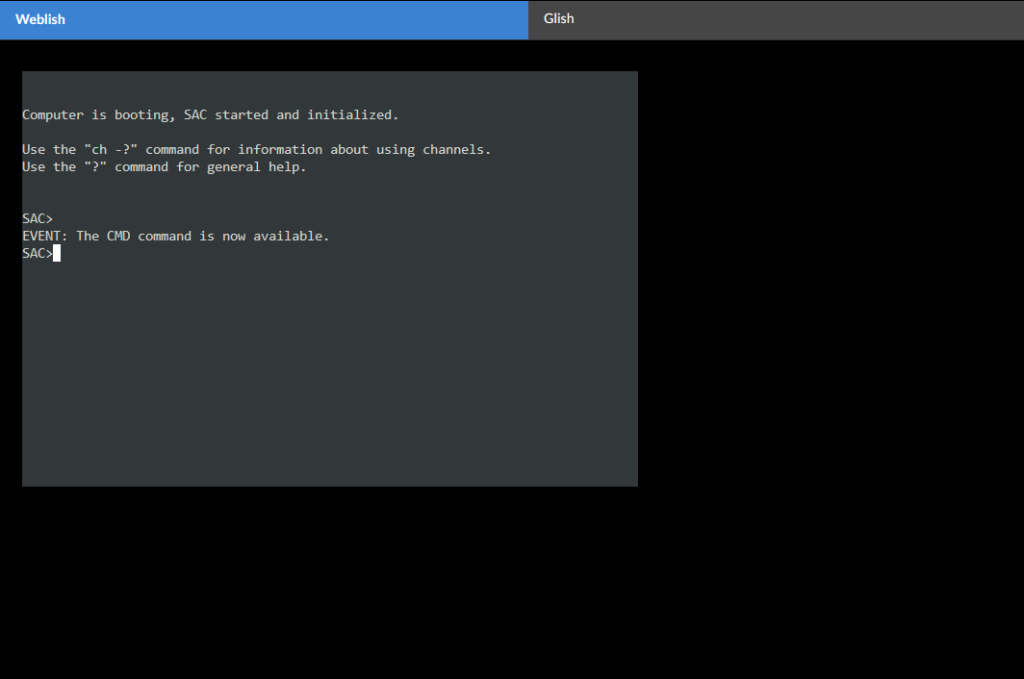
What we see here is Special Admin Console (SAC) capability built into Windows.
Type in "cmd" and press Enter. You will get an output saying that a new "channel" was created.
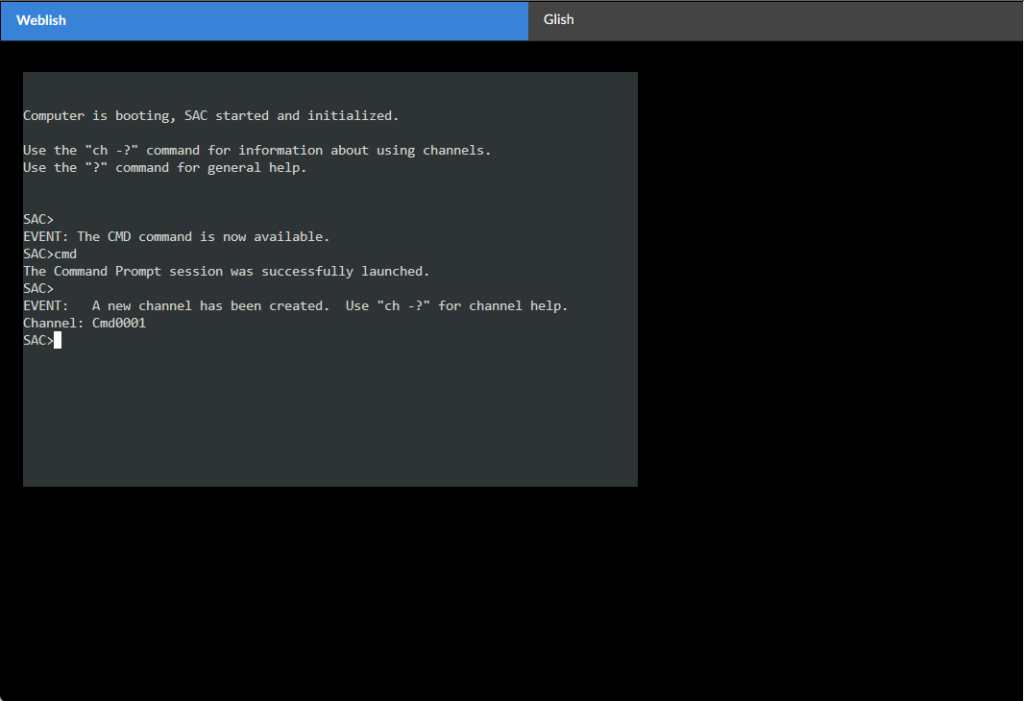
After the channel has been created, we need to switch to it.
We can do that by pressing ESC and then TAB. This will switch us to the new channel and prompt us to authenticate to the server. If you ever used screen in Linux, this concept will be familiar to you :)

After logging in, you'll be presented with a familiar looking command prompt screen.
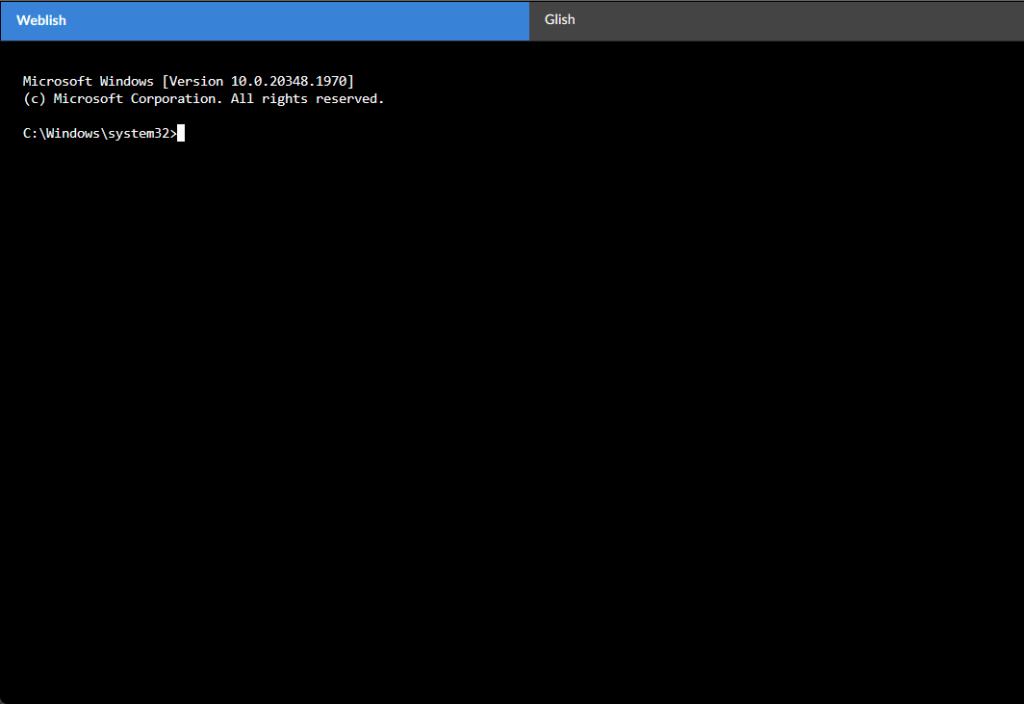
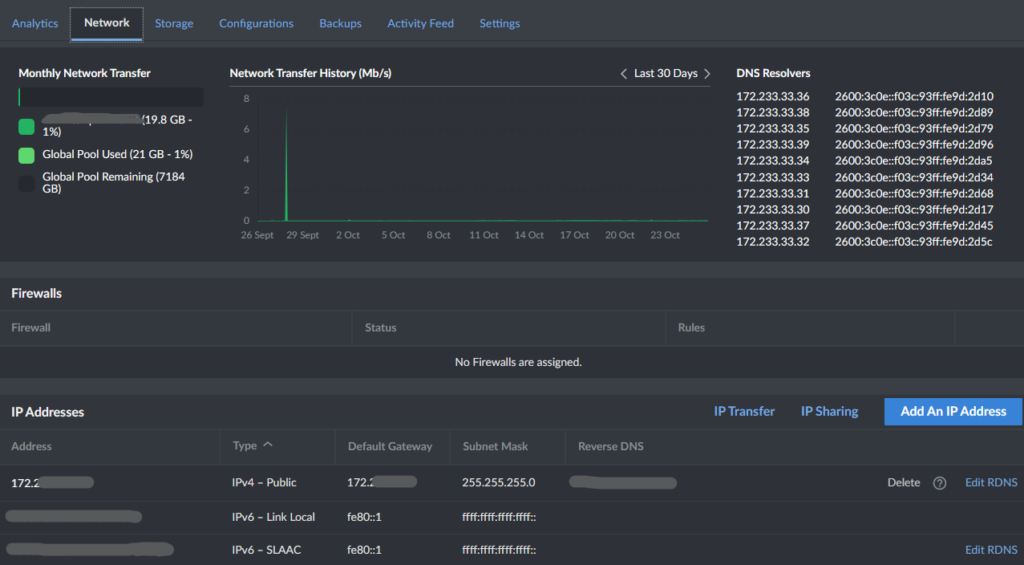
From here you can launch Powershell to do more complex stuff, but now we will just configure the new network settings by using the classic netsh command. Make sure to replace the IP address and the subnet to match your VM. You can see those settings in Cloud Manager by clicking on your VM and then on the Network tab
#Example
netsh interface ip set address "Ethernet" static YourNewIP Mask Gateway

#Example
netsh interface ip set address "Ethernet" static 172.233.47.111 255.255.255.0 172.233.47.1
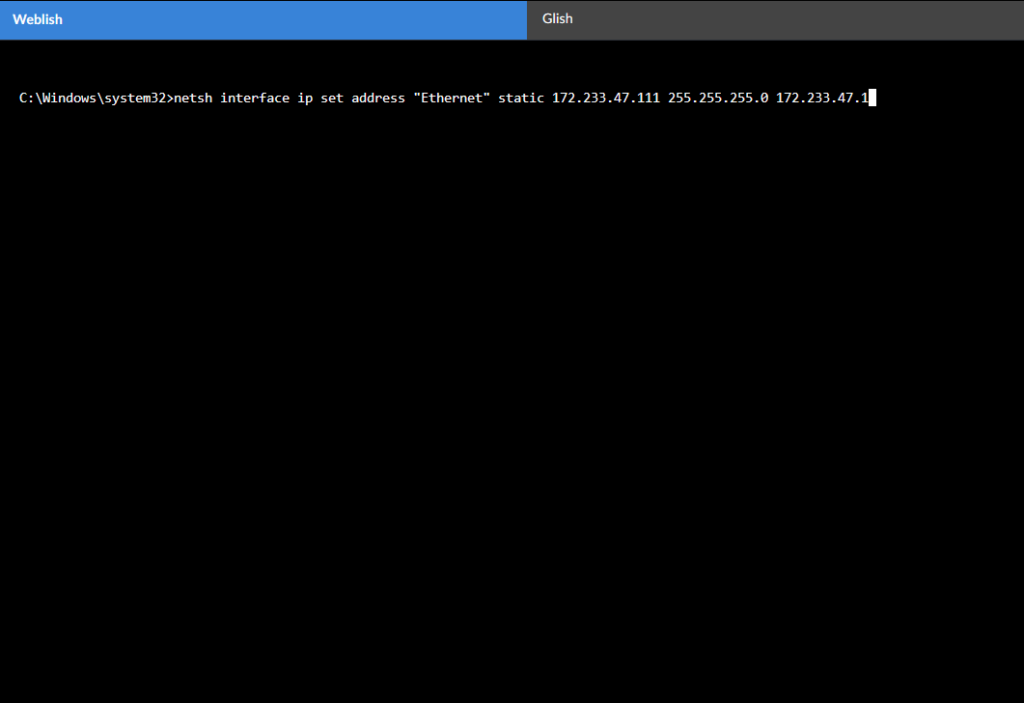
In case you have multiple network interfaces attached to your VM, make sure to replace "Ethernet" with the name of your adapter.
Cheers, Alex.


Comments