How to deploy a DHCP server in a Linode VLAN

When a VLAN is assigned to a network interface and given an IPAM address, the Compute Instance should automatically be able to communicate over that private network. This is due to Network Helper, which is enabled by default on most instances. For compatible distributions, Network Helper adjusts the internal network configuration files. Any network interfaces defined in the Compute Instance’s selected Configuration Profile (including those with VLANs attached) are automatically configured.
While Network Helper is really useful, it's becomes a problem when you deploy an instance serving as an internet gateway in your VLAN. In order to assign an IP address, DNS and a gateway, we need to deploy a DHCP server. Network Helper cannot set DNS and gateway settings.
Please have in mind that you can also install the DHCP server on your IGW (Internet gateway) instance as well, but for the purposes of this post, we will assume that we have a standalone DHCP server.
First thing we need to do is to create a Linode StackScript which we will use to automatically install and configure our DHCP server.
#!/bin/bash
#<UDF name="DEFLEASETIME" Label="Default lease time" example="3600" />
#<UDF name="MAXLEASETIME" Label="Max lease time" example="14400" />
#<UDF name="SUBNET" Label="Subnet" example="10.10.10.0" />
#<UDF name="NETMASK" Label="Netmask" example="255.255.255.0" />
#<UDF name="STARTRANGE" Label="Start range" example="10.10.10.10" />
#<UDF name="ENDRANGE" Label="End range" example="10.10.10.250"/>
#<UDF name="ROUTER" Label="Router" example="10.10.10.1" />
#<UDF name="DNS1" Label="DNS1" example="10.10.10.2" />
#<UDF name="DNS2" Label="DNS2" example="10.10.10.3" />
apt update -y
apt install -y isc-dhcp-server
mv /etc/dhcp/dhcpd.conf{,.backup}
cat > /etc/dhcp/dhcpd.conf << EOF
default-lease-time $DEFLEASETIME;
max-lease-time $MAXLEASETIME;
authoritative;

subnet $SUBNET netmask $NETMASK {
 range $STARTRANGE $ENDRANGE;
 option routers $ROUTER;
 option domain-name-servers $DNS1, $DNS2;
}
EOF
sed -i 's/INTERFACESv4=""/INTERFACESv4="eth1"/' /etc/default/isc-dhcp-server
systemctl restart isc-dhcp-server.service
After we've got our StackScript created, we can deploy a VM from it by clicking on "Deploy New Linode" button and filling out all the required details. Make sure that you assign the virtual machine to the VLAN you are using in your region.
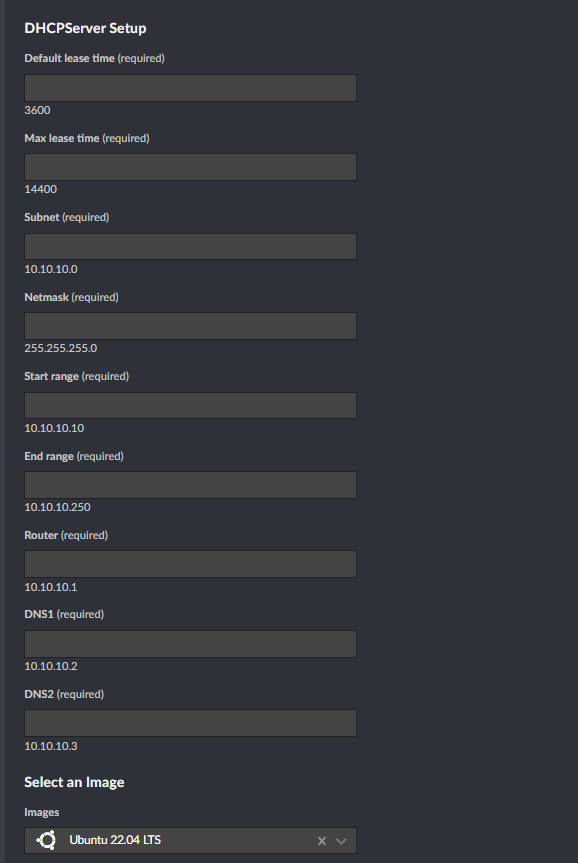
You can use default settings for "Default lease time" and "Max lease time", just make sure to adjust the "Subnet" and mask to match the ones you're using in your VLAN.
We can also use Terraform to create our Stackscript by using "linode_stackscript" resource - https://registry.terraform.io/providers/linode/linode/latest/docs/resources/stackscript
For details on how to use Terraform to deploy instance from a StackScript, check out this blog post on how to use "stackscript_data" block to provide StackScript parameters - https://blog.slepcevic.net/deploying-linode-marketplace-stackscripts-with-terraform/
Cheers, Alex.


Comments