Deploying a GLOBAL sentiment Analysis service using DeepSparse and Akamai Connected Cloud
In the previous post, we explored how to deploy a sentiment analysis application using Neural Magic’s DeepSparse on Akamai Connected Cloud (Linode).
We leveraged just two dual-core VMs and a Nodebalancer to process a pretty impressive number(40K) of movie reviews in just 20 minutes. However, deploying in a single region can lead to latency/availability issues and doesn’t fully utilize the global reach of modern cloud infrastructure Akamai Connected Cloud offers.
Also, single region deployments are kinda boring 🙂
In this post, we’ll expand our deployment by setting up virtual machines in all available Linode regions and replacing the current Nodebalancer with Akamai’s new Cloud Load Balancer (currently in beta access).
What is Akamai’s new Cloud Load Balancer you may ask? It’s really cool peace of tech.
Think of it like an umbrella over the internet; it gives you the possibility to load balance your workloads across ANY location; it can be on prem, Akamai’s cloud, some other hyper-scaler, heck, it can even be your home IP address if you want to 🙂
As long as it can be reached over the internet, Cloud Load Balancer can use it to deliver the request.
Joking aside, here’s a more official description of the service:
The Akamai Cloud Load Balancer (ACLB) (formerly referred to as Akamai Global Load Balancer) is a layer 4 and 7 load balancer that distributes traffic based on performance, weight, and content (HTTP headers, query strings, etc.). The ACLB is multi-region, independent of Akamai Delivery, and built for East-West and North-South traffic. Key features include multi-region/multi-cloud load balancing and method selection.
Why Scale Globally?
Scaling out our application across multiple regions has several benefits:
- Reduced Latency: By having servers closer to our users, we can significantly reduce the time it takes for requests to travel back and forth.
- High Availability: Distributing the load across multiple regions ensures that if one region goes down, well, we kinda don’t care, our app stays online 🙂
- Better Performance: I mean, you can’t beat physics; simply having the possibility to do compute closer to the user improves performance and user experience.
Step-by-Step Deployment Guide
Ok, let’s get into the meaty part; codebase from our previous post hasn’t changed significantly; only thing which we changed is that we’re not hardcoding out region anymore, but we are fetching the list of available regions from Linode API and deploying an instance in each region.
In the code which fetches the regions, you will notice that I commented out the authentication part.
Some regions are available only to authenticated users; if you’re one of those, just uncomment those few lines and the full region list will be returned to you.
Let’s start with terraform plan and see what we will create.
terraform plan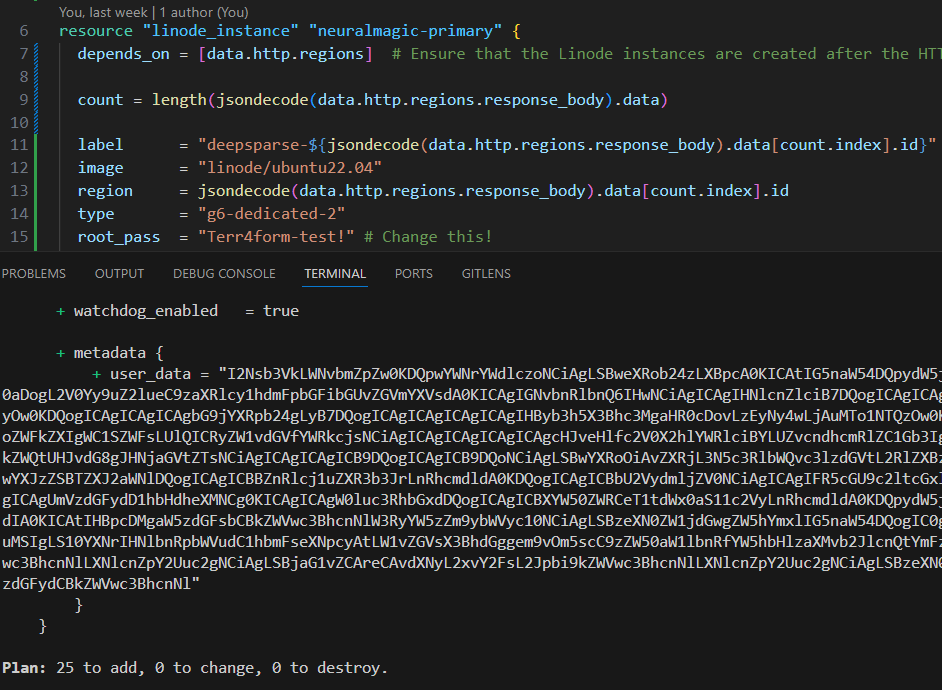
Ok, 25 instances, just what we expect since Akamai has 25 compute regions currently publicly available.
Let’s proceed with terraform apply
terraform apply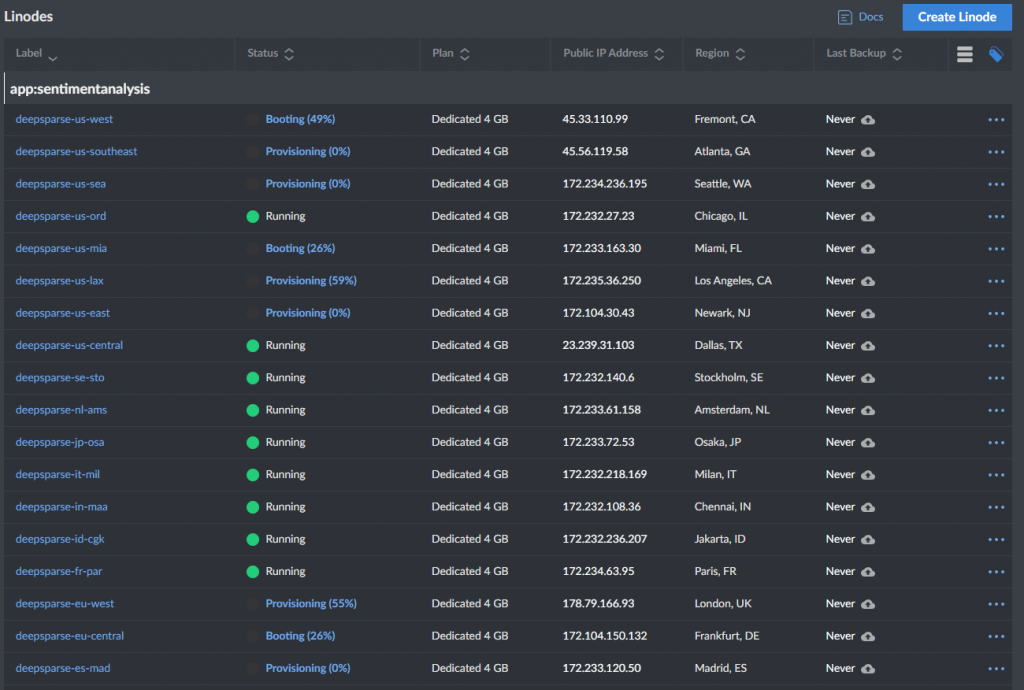
I don’t know about you, but I always nerd out on seeing a bunch of servers popping up in the console 😀
In a minute or two we should have all instances deployed. After the instances have been deployed, cloud-init will kick off and install DeepSparse server with an Nginx proxy in front (check out the previous post or the YAML file in the repo for more details).
Awesome! After we’ve got the infrastructure up and running, last step is to add our nodes to the Cloud load balancer pool; at the moment we will need to do some Clickops 🙁 CLB service is currently in beta so IaC support isn’t out yet.
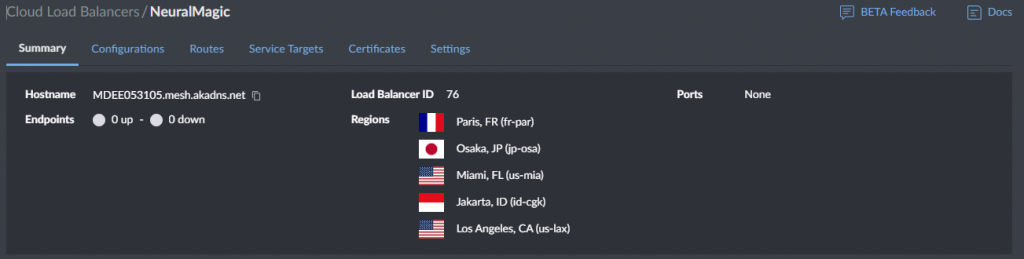
First step is creating a Cloud Load Balancer by clicking the “Create Cloud Load Balancer” button and giving it a name.
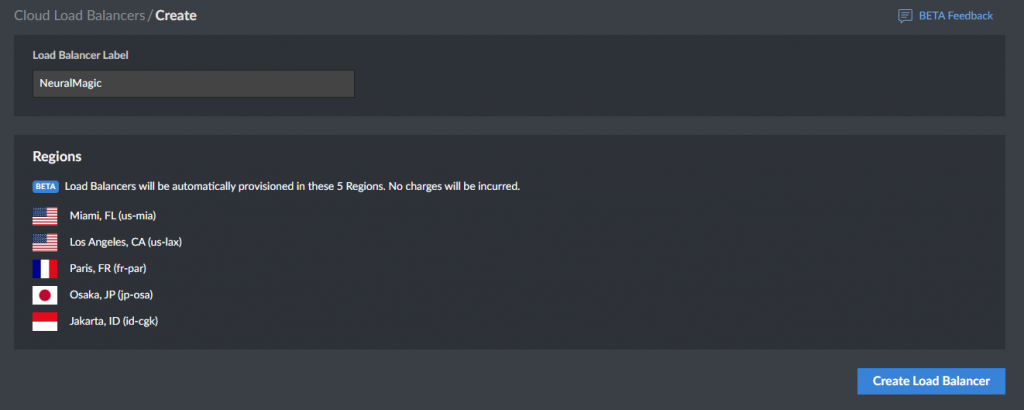
During the beta period, Cloud Load Balancer is deployed only in 5 locations. This number will grow drastically once the service goes GA.
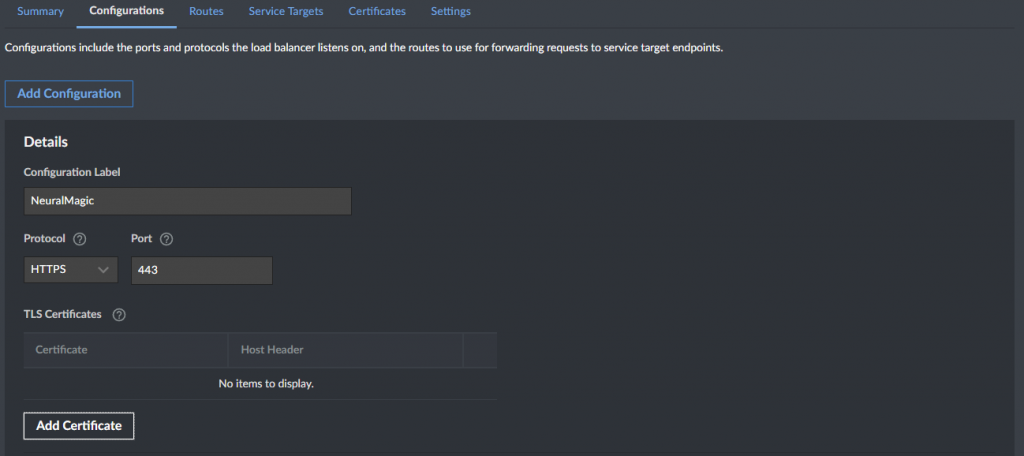
With Akamai’s Cloud Load Balancer, everything starts with a “Configuration“. Let’s create one by pressing “Add Configuration” button.
We will configure our load balancer to “listen” on both HTTP and HTTPS. Once we selected HTTPS as our protocol, we need to add a certificate.
In order to do that, we need to prepare our certificate and private key which we will paste into the configuration field. In this case I will use a self-signed certificate.
At this stage we will only cover the configuration for the HTTPS protocol, HTTP is really easy and won’t bother wasting your time on it.
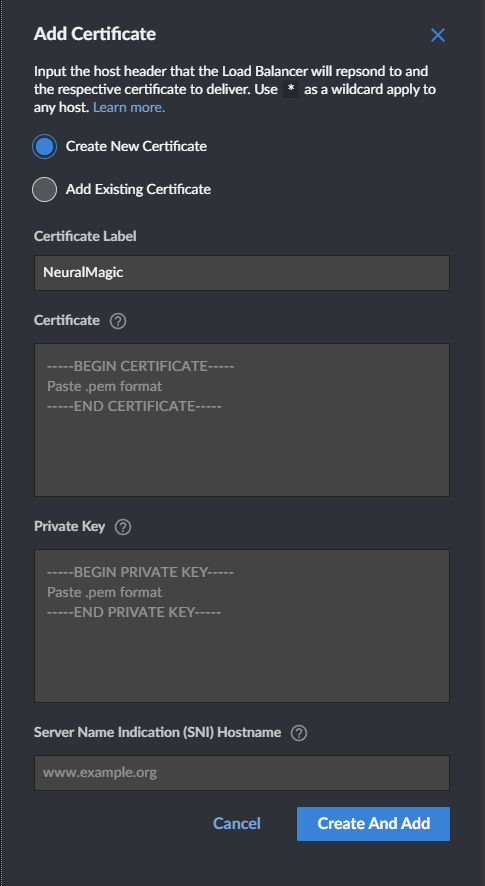
We need to paste in the certificate & the key, enter the SNI hostname and press “Create and Add” button.
After we’ve got the configuration and the certificate added, we need to create a “Route“. Let’s click on “Create a New HTTP Route” button and give it a name.
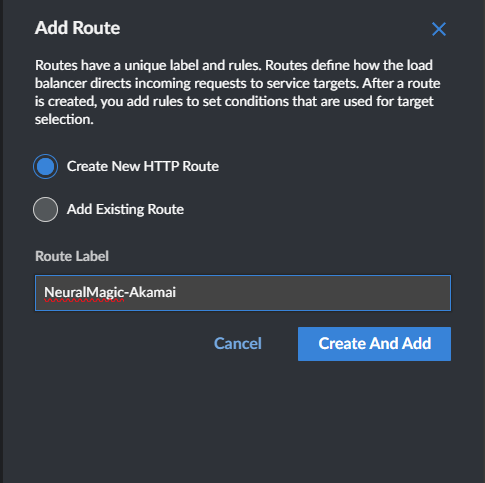
Great, we’ve created a route, but the route is currently empty and it doesn’t route anything. We will come back to this a bit later.
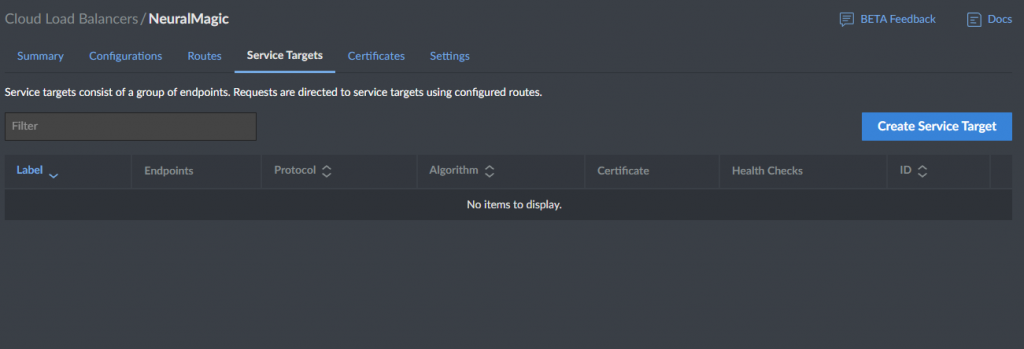
Next step is to save our configuration and click on “Service Targets” tab.
This is the place where we will define our target groups and origin servers. Click on “New Service Target” button
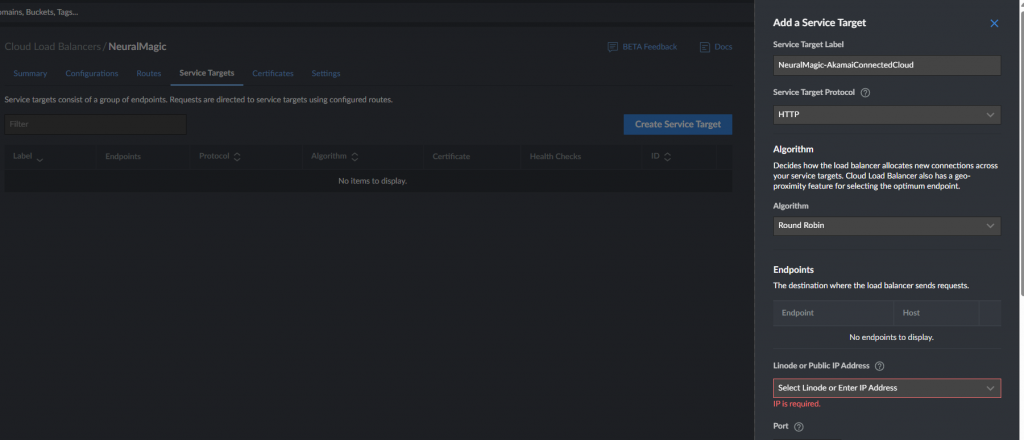
Next steps are quite explanatory, we need to give it a name and add the nodes which we want to load balance across.
Remember, this can be one of the existing Linode instance or it can be ANY IP address which can be reached via the internet.
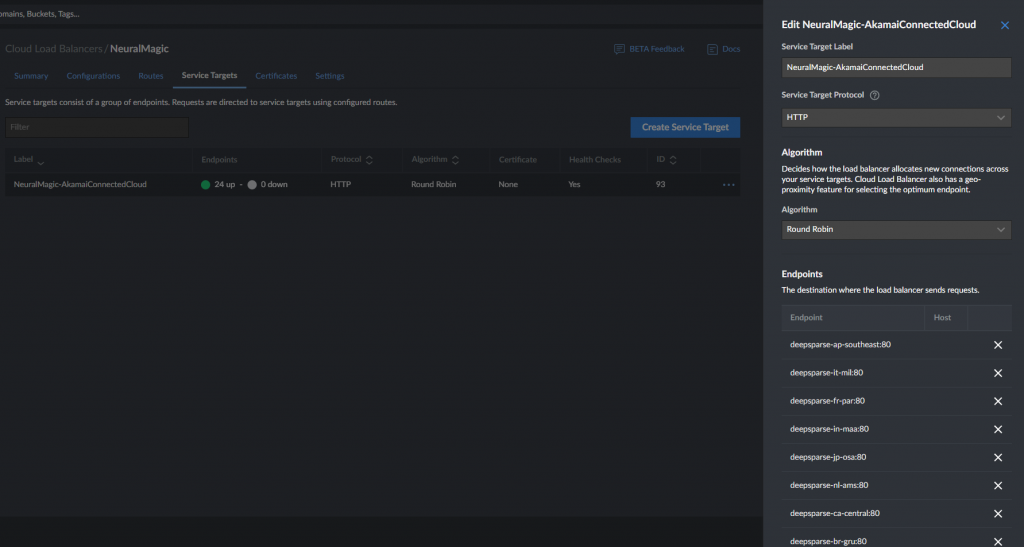
This is the step where I could really use IaC support, we need to add all 25 servers by using ClickOps to our “Endpoints” list. 🙂
This is also the place where you can also select the load balancing algorithm which will be used to balance requests between the nodes. At the moment there are 5 of them available:
- Round Robin
- Least Request
- Ring Hash
- Random
- Maglev
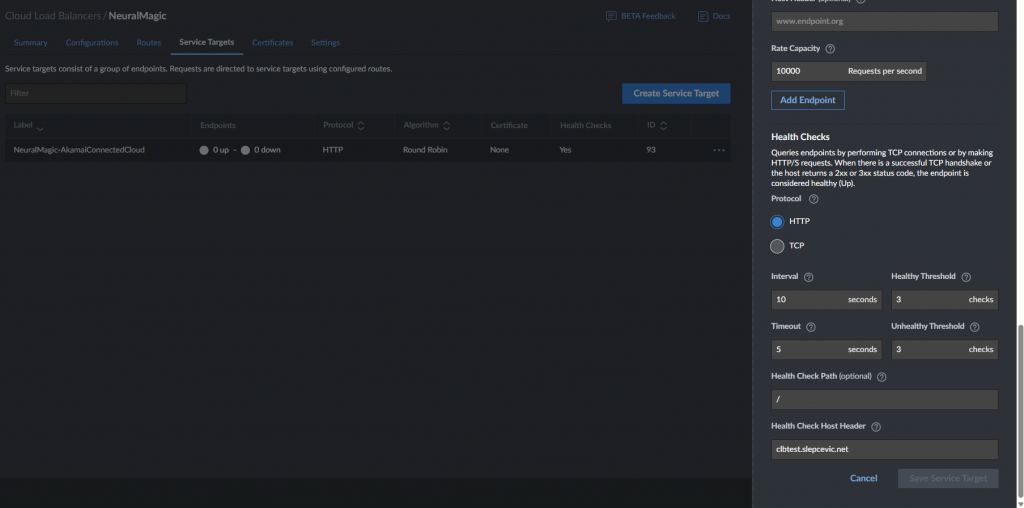
Last step in “Service Target” configuration is to set the path and host header we will use for the health checks on the nodes and click on “Save Service Target” button.
We’re almost there, I promise 😀
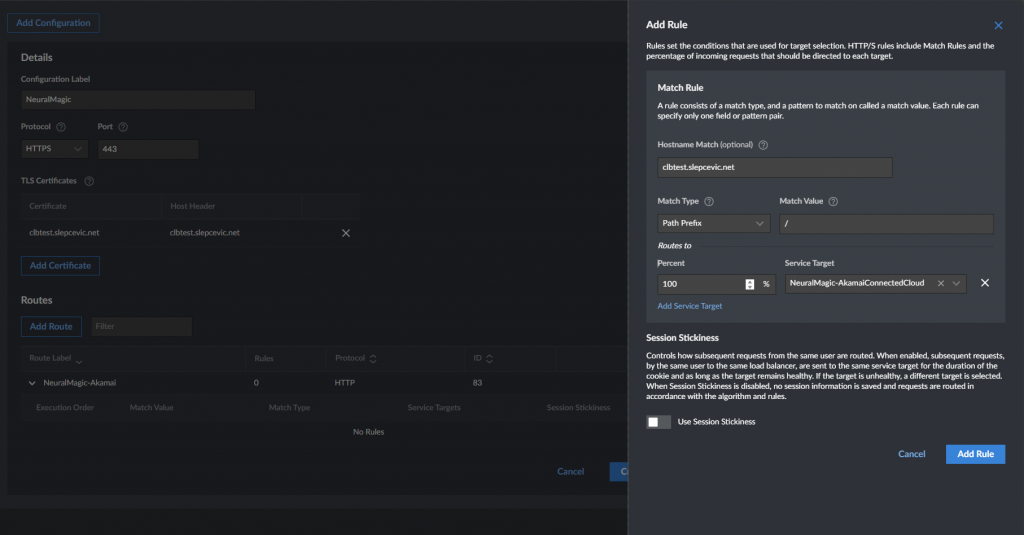
Final step is to go back to the “Routes” tab, click on the route which we’ve created earlier and click on Edit button.
In the rule configuration we will enter the hostname which we want to match upon and select our “Service target” from the dropdown.
We can also do advanced request matching based on path, header, method, regex or query string but for now we will use path prefix.
Ok, we have configured our Cloud Load balancer; final step to get our application running is to create a CNAME record for my subdomain “clbtest.slepcevic.net” and point it to “MDEE053110.mesh.akadns.net” (visible in the Summary page of the load balancer).
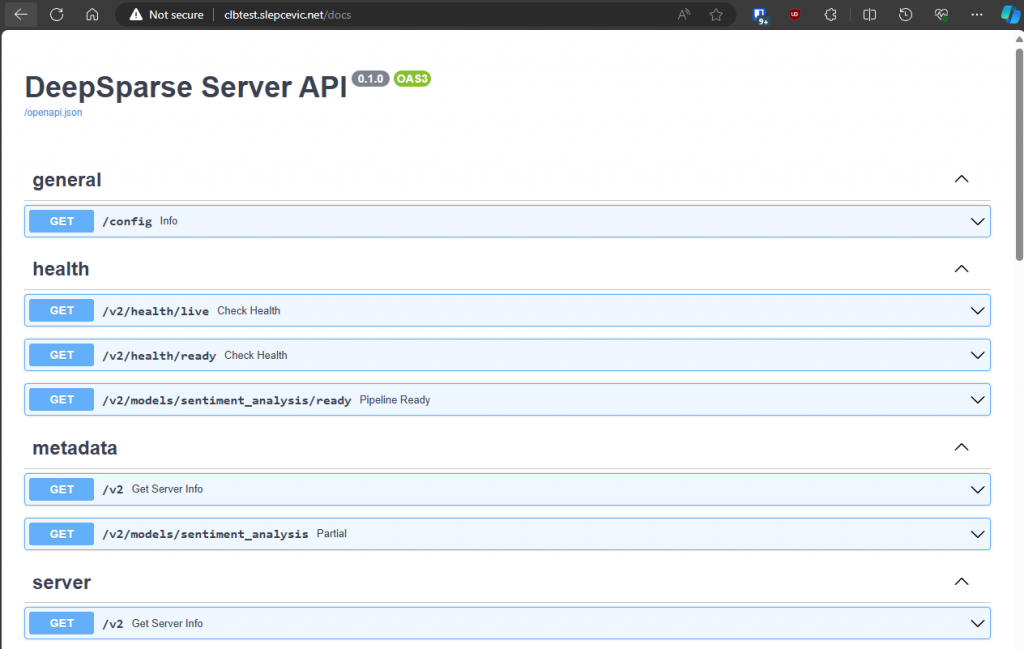
Let’s go ahead and visit our website. We see that our DeepSparse API server is happily responding and ready to receive requests! Woohoo!
Yes, it’s that easy. In less than 10 minutes we have deployed a globally distributed application on Akamai Connected Cloud. Once IaC support for Cloud Load Balancer is rolled out, we can bring this time down to 5 minutes without any problems.
Ok, 25 regions is cool, but that isn’t truly global is it? 🙂
Yes, you’re right; with 25 regions we have covered the large majority of the global (internet) population. Can we do better? For sure! Welcome Gecko!
Gecko?
Akamai’s new initiative, code-named Gecko, is set to revolutionize cloud computing by integrating cloud capabilities directly into Akamai’s extensive edge network. This move aligns perfectly with Akamai’s strategy to provide high-performance, low-latency, and globally scalable solutions. By embedding compute capabilities at or VERY near the edge, Gecko aims to deliver workloads closer to users, devices, and data sources than ever before.
What Does Gecko Mean for Our Deployment in the future?
Gecko’s will enable us to deploy our sentiment analysis application in hundreds of new locations worldwide, including traditionally hard-to-reach areas. This means extremely reduced latency, improved performance, and enhanced availability for users across the world.
The Benefits of Deploying on Gecko
- Ultra-Low Latency: By running our workloads even closer to end-users, we can drastically reduce the time it takes to process and respond to requests.
- Global Reach: With Gecko, we can deploy in cities and regions where traditional cloud providers struggle to reach, ensuring a truly global presence.
- Scalability and Flexibility: With Akamai’s large compute footprint, we can scale out our application to tens of thousands of nodes across hundreds of locations.
- Consistent Experience: Let’s be real, if you’re running a global application, you’re most probably dealing with multiple providers; with Gecko we can consolidate all of your workloads and location coverage with a single provider. Just the operational benefits of that should be enough to “tickle” your brain into considering it for your application.
Want to try it yourself?
Have fun 🙂 Go ahead and clone the repo from https://github.com/slepix/neuralmagic-globalLinode and sign up to receive beta access to the new Cloud Load balancer on https://www.linode.com/green-light/ .
NeuralMagic running across all Linode (including Gecko) regions in the next post? Perhaps 🙂
Cheers! Alex