Sentiment analysis of 40 thousand movie reviews in 20 minutes using Neural Magic’s DeepSparse inference runtime and Linode virtual machines.
First, let me start with a word or two about DeepSparse.
DeepSparse is a sparsity-aware inference runtime that delivers GPU-class performance on commodity CPUs, purely in software, anywhere.
GPUs Are Not Optimal – Machine learning inference has evolved over the years led by GPU advancements. GPUs are fast and powerful, but they can be expensive, have shorter life spans, and require a lot of electricity and cooling.
Other major problems with GPU’s, especially if you’re thinking in the context of Edge computing, is that they can’t be packed as densely and are power ineffective compared to CPU’s; not to mention availability these days.
Since Akamai recently partnered up with Neural Magic, I’ve decided to write a quick tutorial on how to easily get started with running a simple DeepSparse sentiment analysis workload.
In case you want more about Akamai and Neural Magic’s partnership, make sure to watch this excellent video from TFiR. It will also give you a great summary of Akamai’s Project Gecko.
What is Sentiment analysis?
Sentiment analysis (also known as opinion mining or emotion AI) is the use of natural language processing, text analysis, computational linguistics, and biometrics to systematically identify, extract, quantify, and study affective states and subjective information. Sentiment analysis is widely applied to voice of the customer materials such as reviews and survey responses, online and social media, and healthcare materials for applications that range from marketing to customer service to clinical medicine.
Why is DeepSparse cool? Because I’m doing analysis of 40 thousands movie reviews in 20 minutes using only TWO DUAL CORE Linode VM’s. Mind officially blown.
Let’s do some math here; rounding it up to 120 thousand processed reviews an hour, with 2 instances and a load balancer, we can process over 86 million requests a month which will cost you a staggering 82$ 😀.
If you’re doing that on other cloud providers, you’re paying a five digit monthly bill for that pleasure.
Want to try it yourself? It’s easy!
If you want to try it out on Linode, follow instructions below.
If you want to check out Neural Magic DeepSparse repo, head out here.
Step 1. Clone the Repository.
Open your terminal or command prompt and run the following command:
git clone https://github.com/slepix/neuralmagic-linodeThis code will deploy 2 x Dedicated 4 GB virtual machines and a Nodebalancer. It will also install Neural Magic’s DeepSparse runtime as a Linux service and install & configure Nginx to proxy requests to DeepSparse server listening on 127.0.0.1:5543.
WARNING: THIS IS NOT PRODUCTION GRADE SERVER CONFIGURATION!
It’s just a POC! Secure your servers and consult Neural Magic documentation if you want to go to production.
Step 2. – Terraform init
Navigate to the repo using the following command:
cd neuralmagic-linodeIf you haven’t already installed Terraform on your machine, you can download it from the official Terraform website and follow the installation instructions for your operating system.
Step 3.
Initialize Terraform by running:
terraform initStep 4. – Configure your Linode token
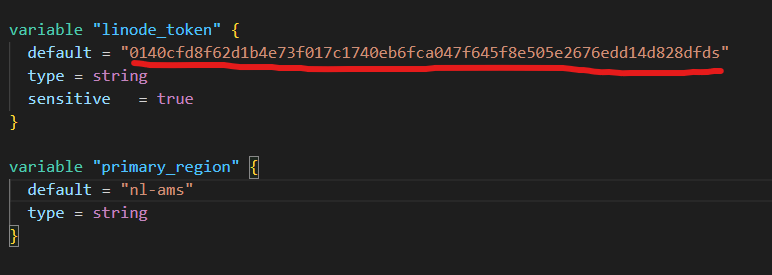
Open variables.tf file and paste in your Linode token. If you don’t know how to create a Linode PAT, check this article here. It should look similar like the picture. You can also adjust the region while you’re here 😀
Token in the picture is not valid. It's just an example.

Step 5 – Run Terraform apply
After configuring your variables, you can apply the Terraform configuration by running:
terraform applyTerraform will show you a plan of the changes it intends to make.
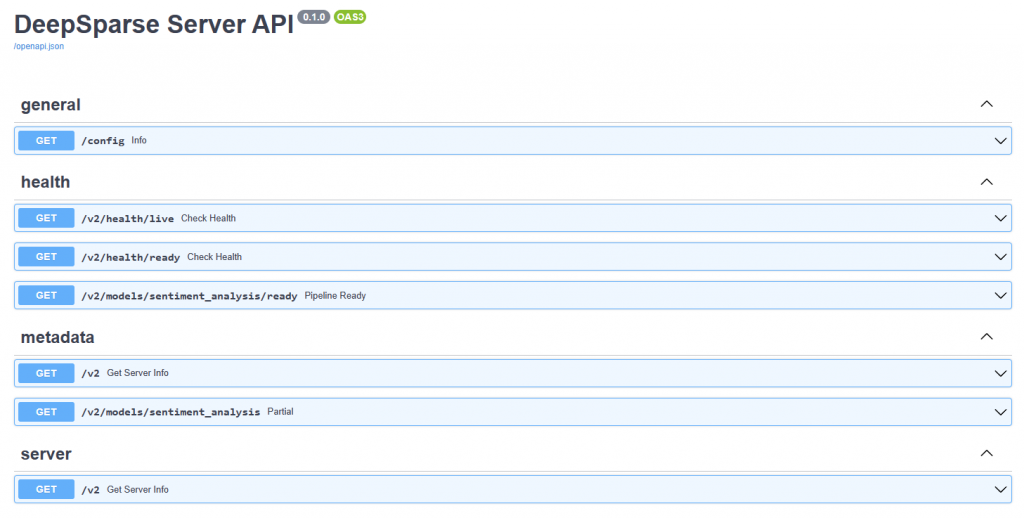
Review the plan carefully, and if everything looks good, type “yes" and press Enter to apply the changes. Give it 5-6 minutes to finish everything and by visiting your Nodebalancer IP, you should be presented with a landing page for DeepSparse server API.

Step 6.
After the installation is done, it’s finally time to send some data to our API and see how it performs.
We can do that by using curl or invoke-webrequest if you’re on Windows and using Powershell.
CURL:
sentence="Neural Magic & Akamai are cool!"
nodebalancer="172.233.34.110" #PUT YOUR NODEBALANCER IP HERE
curl -X POST http://$nodebalancer/v2/models/sentiment_analysis/infer -H "Content-Type: application/json" -d "{\"sequences\": \"$sentence\"}"
PowerShell:
$sentence = "Neural Magic & Akamai are cool!"
$nodebalancer = "172.233.34.110"

$path = "v2/models/sentiment_analysis/infer"
$api = "http://$nodebalancer/$path"
$body = @{
   sequences = $sentence
} | ConvertTo-Json

(Invoke-WebRequest -Uri $api -Method Post -ContentType "application/json" -Body $body -ErrorAction Stop).content
In both cases make sure to paste in the IP address of the Nodebalancer you deployed and modify the sentence as you wish.
Benchmark time!
In the repository, I’ve included a file called movies.csv and three files; two PowerShell and one Python file.
movies.zip – unzip this one in the same folder where your benchmark scripts are.
analyze.ps1 – PowerShell based benchmark, sends requests in serial – not performant.
panalyze.ps1 – PowerShell based benchmark, sends requests in parallel – better performant
pypanalyze.py – Python based benchmark, sends requests in parallel – best performer (doh!) <-use this

All you need to do to in order to kick off a benchmark is to update the the URL variable with your Nodebalancer IP and you’re off to the races.
Does it scale?
Yes! For kicks I’ve added a third node and the same job finished in 825 seconds. Feel free to add as many nodes as you like and see what numbers you can get. Additionally, you can play with the number of workers in the Python file.
Note 1: python script has been written with the help of ChatGPT :) Results matched with my PowerShell version against verified smaller sample size(check note 2), so I'm gonna call it good :)

Note 2: PowerShell versions don't handle some comments as they should and end up sending garbage to the API. Happens in 3% of the cases. Most probably some encoding/character issue which I couldn't be bothered to fix :)

Note3: Movies.csv file has been generated by using data from https://kaggle.com/
Cheers,
Alex.


